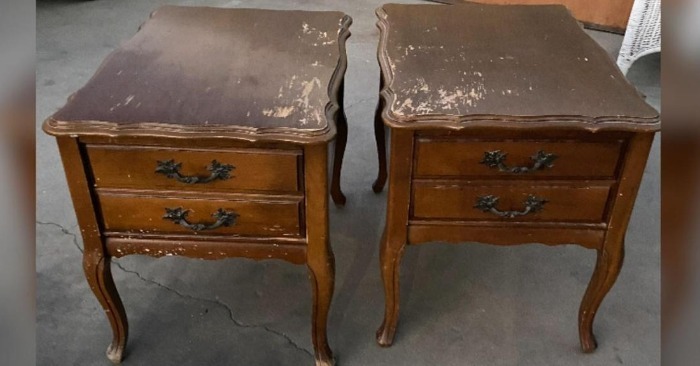
When I first saw these old, worn-out nightstands, I must admit, I was quite discouraged. The varnish was peeling, the color was faded, and the hardware looked worn out. But the longer I looked at them, the stronger my desire to try to change something became. At some point, I decided to renovate them myself. Here are step-by-step instructions on how I turned old furniture into a stylish and fresh interior element.

Step 1. Assessing the condition and preparation
First, I carefully examined the nightstands. The surface was scratched, and the old coating was completely worn off in places, but the structure itself was sturdy. I removed the hardware and prepared my workspace.
Tip: cover the floor with plastic sheeting and set aside a few hours — there will be a lot of dust.
Step 2. Sanding
This was the dustiest stage. First, I used coarse sandpaper to remove the remaining varnish, then fine-grained sandpaper to achieve smoothness. I sanded the legs and curved parts by hand and the straight surfaces with a sander. After finishing, I wiped the cabinets with a damp cloth to remove all debris.
Step 3. Priming
To ensure the paint went on evenly, I applied a thin layer of primer. This improves adhesion and creates a smooth base. I let the surface dry thoroughly.
Step 4. Painting the body
For the body, I chose a matte shade of soft green—it gave the furniture a noble and modern look. I applied two coats of paint with a brush and roller, taking breaks to let it dry. The color went on evenly and beautifully emphasized the smooth lines of the legs.
Step 5. Renovating the tabletop
I decided to make the top lighter, with a bleached wood effect. To do this, I used a light stain and a light brushing technique — I lightly “combed” the wood fibers to add texture. After drying, I covered the surface with two coats of matte varnish.
Step 6. Working with the hardware
I didn’t throw away the original handles — I just updated them. I cleaned them, then covered them with decorative brass paint. As a result, they look like new and go well with the green body.
Step 7. Final assembly
When all the elements were dry, I screwed the hardware back on and wiped the furniture with a soft cloth. And here I was in for a pleasant surprise — there was no trace left of the shabby old nightstands.

Now they look elegant, fresh, and very modern. In essence, I simply gave the furniture a second life — and it turned out to be much easier than it seems. Now these nightstands don’t just take up space — they attract attention and add style to the room.